Why Is My Water Bill So High? Hidden Leak Detection Guide
A water bill that suddenly jumps $50, $100, or more than expected is alarming — and it almost always means something is wrong. The good news is that most high water bill causes are diagnosable at home with nothing more than a meter reading and a few simple tests. The bad news is that some leaks — particularly slab leaks and irrigation system failures — can waste tens of thousands of gallons before anyone notices.
This guide walks through every major cause of an unexpectedly high water bill, the DIY tests you can run this weekend, and the smart leak detection devices that can prevent the problem from happening again.
First Step: Rule Out Billing Errors and Seasonal Changes
Before assuming you have a leak, check two things:
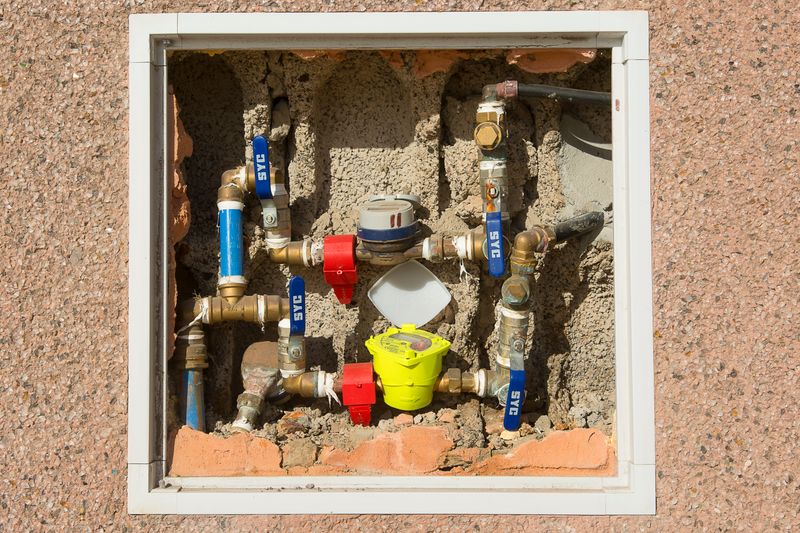
Billing errors: Utility billing errors are uncommon but real. Compare your current bill’s meter reading against your actual meter. Your water meter is usually located near the street at the property line inside a covered box (flush with the ground) or in the basement or utility room. If the billed number differs from the meter, contact your utility immediately.
Seasonal changes: In warmer months, irrigation systems, car washing, and pool refilling increase water use substantially. A bill that’s 20 to 30 percent higher in summer may reflect legitimate increased use rather than a leak. Compare your current bill to the same month last year, not last month.
If neither of these explains the spike, proceed to leak detection.
The Most Common Causes of a High Water Bill
1. Running Toilets
A running toilet is the single most common cause of unexplained high water bills. A toilet that runs continuously can waste 200 gallons per day — roughly 6,000 gallons per month. At $0.005 per gallon (a common US rate), that’s $30 per month from a single toilet. Some faulty flappers waste far more.
The most common cause is a worn or warped flapper valve — the rubber seal at the bottom of the tank that controls water flow into the bowl. When the flapper doesn’t seal properly, water continuously trickles from the tank into the bowl and the fill valve runs to compensate.
How to check: Listen carefully for a faint hissing sound from the toilet when it hasn’t been flushed recently. You can also drop a few drops of food coloring (or a dye tab) into the tank and wait 15 minutes without flushing — if color appears in the bowl, the flapper is leaking.
Replacement flappers cost $5 to $15 and are a 10-minute DIY repair.
2. Leaking Faucets and Supply Lines
A faucet that drips once per second wastes approximately 3,000 gallons per year. That’s not catastrophic, but a home with three dripping faucets adds up quickly. More concerning are supply line leaks under sinks or behind appliances — these can go unnoticed for months inside a cabinet, causing both water waste and mold damage.
Check under every sink, behind the refrigerator (if it has a water line), and behind the washing machine for signs of moisture or corrosion on supply line connections.
3. Irrigation System Leaks
Irrigation systems are responsible for a disproportionate share of water waste. A broken sprinkler head can release 10 to 15 gallons per minute. If your system runs for 30 minutes with one broken head, that’s 300 to 450 gallons lost in a single cycle — gone before most homeowners notice the wet patch in the yard.
Common irrigation leak sources:
- Cracked or broken sprinkler heads from lawn mowers or vehicle traffic
- Failed valve diaphragms that allow zones to run continuously or not shut off
- Cracked lateral lines from soil movement or freezing
- Improperly capped or couplings that have separated underground
How to check: Run each irrigation zone individually and visually inspect every head for spurting, pooling, or geysering. Check the controller to ensure no zone is running when it shouldn’t be. After each zone completes, check for wet areas that persist longer than 30 minutes — that can indicate a cracked lateral line.
4. Slab Leaks
A slab leak is a leak in a water supply or drain line running beneath a concrete slab foundation. These are among the most destructive and expensive plumbing problems a homeowner can face.
Warning signs of a slab leak:
- Warm or hot spots on the floor (supply line leak with hot water)
- Sound of running water when all fixtures are off
- Cracks appearing in flooring, walls, or the foundation
- Unexplained wet areas on the floor, particularly carpet that is damp from below
- Significantly elevated water bill with no identified fixture-level leak
Slab leak causes: Copper pipe corrosion (particularly in acidic or high-chlorine water), pipe-to-pipe abrasion at penetrations through the slab, poor installation, and soil movement are the primary causes.
What to do: Slab leak detection requires professional equipment — acoustic listening devices and thermal imaging cameras used by plumbing leak detection specialists. If you suspect a slab leak, call a licensed plumber with leak detection capability. Do not delay — slab leaks worsen over time and can cause foundation damage that costs tens of thousands to remediate.
Repair methods include pipe rerouting (running new lines through the walls and ceiling, bypassing the slab entirely), epoxy pipe lining for small leaks, and spot repair (breaking out the slab at the leak location). Pipe rerouting is often the most reliable long-term solution.
5. Water Softener Cycling Problems
Water softeners regenerate by flushing with salt water and rinsing with fresh water. A malfunctioning water softener can get stuck in a regeneration cycle, sending hundreds of gallons to the drain every day. This is surprisingly common and often overlooked because the water softener is out of sight.
How to check: Put your ear next to the water softener’s drain line — if water is flowing to the drain when the unit is not scheduled to regenerate, the control valve is stuck. Most water softener control valves can be manually advanced out of a stuck position; consult your owner’s manual. A replacement control valve typically costs $100 to $300.
6. Pressure-Reducing Valve (PRV) Failure
A pressure-reducing valve maintains safe water pressure (typically 50 to 75 PSI) coming into the home from the street main. When a PRV fails in the open position, water enters the house at full street pressure — sometimes 80 to 150 PSI. This excess pressure stresses every joint, connection, and appliance in the home, causing micro-leaks throughout the system that collectively waste significant water.
Check your water pressure with a pressure gauge (available at any hardware store or on Amazon) at an outdoor hose bibb. Normal residential pressure is 45 to 80 PSI. Above 80 PSI indicates a PRV problem or the absence of a PRV entirely.
DIY Leak Detection Tests
The Water Meter Test (2-Hour Shut-Off Test)
This is the most reliable whole-home leak detection method available without professional equipment.
- Turn off every water fixture in the house: faucets, showers, appliances, ice makers, irrigation controllers.
- Go to your water meter and note the exact reading — most meters have a small leak indicator dial (a triangular pointer or star shape) that spins when any water is flowing.
- Do not use any water for 2 hours.
- Return to the meter and note the reading again.
Interpreting results:
- If the meter reading has not changed at all: no significant leak detected (very minor drips may not register)
- If the leak indicator dial was spinning during the test: water was flowing somewhere during the test — you have a leak
- If the meter reading changed: calculate the flow and begin looking at the sources listed above
The Toilet Dye Test
Drop a toilet dye tablet (or several drops of food coloring) into the toilet tank. Wait 15 minutes without flushing. Check the bowl — if dye color appears, the flapper is leaking.
Toilet dye test tabs on Amazon
Run this test on every toilet in the house. Multi-bathroom homes frequently have one toilet that is the primary waster while others look fine.
The Meter Isolation Test
If you have a leak but aren’t sure whether it’s inside the house or in the supply line between the meter and the house:
- Turn off the main shut-off valve inside the house (typically at the pressure-reducing valve or where the supply line enters the house).
- Check the meter leak indicator — if it continues to spin with the interior shut-off closed, the leak is in the underground supply line between the meter and the shut-off, which requires professional excavation and repair.
- If the indicator stops spinning when the interior shut-off is closed, the leak is inside the house.
Smart Water Leak Detectors
If you want ongoing protection — not just a one-time check — smart water leak detection devices are increasingly affordable and effective. These fall into two categories:
Whole-Home Automatic Shut-Off Systems
Flo by Moen Smart Water Monitor and Shutoff The Flo by Moen is the most fully featured residential water leak detection system available. It installs on the main water supply line and continuously monitors flow rate, pressure, and temperature. It runs a daily “Health Test” that detects micro-leaks by pressurizing the system and checking for pressure drop.
When it detects a leak — or when a pipe bursts — it automatically shuts off the main water supply. It alerts you via smartphone app and provides detailed water usage data. The Flo by Moen requires professional installation on the supply line. View the Flo by Moen on Amazon
Phyn Plus Smart Water Assistant The Phyn Plus is a direct competitor to the Flo by Moen with similar features: main line installation, continuous monitoring, automatic shut-off, and smartphone alerts. Phyn uses ultrasonic flow sensing technology rather than mechanical flow meters, which the company claims provides greater sensitivity. View the Phyn Plus on Amazon
Both systems cost $400 to $700 for the device plus $100 to $300 for professional installation. Many homeowner’s insurance companies offer premium discounts (5 to 15 percent) for whole-home leak detection with automatic shut-off, which can offset the cost significantly over time.
Point-of-Use Leak Sensors
For more affordable and simpler protection at specific risk locations, point-of-use leak sensors sound an audible alarm and send smartphone alerts when they detect water. Common placement locations include under the kitchen sink, under bathroom vanities, behind the washing machine, near the water heater, and in the basement.
Govee Water Sensor (Model H5054) The Govee H5054 is a highly rated, affordable water leak sensor that connects to your home Wi-Fi and sends smartphone alerts through the Govee app when it detects moisture. At under $20 per sensor, these are a cost-effective way to get basic coverage at multiple locations. View the Govee Water Sensor on Amazon
Samsung SmartThings Water Leak Sensor For users already in the SmartThings ecosystem, the SmartThings sensor integrates natively and can be configured to trigger automations (turning off a smart valve, sending notifications) when moisture is detected.
Honeywell Home RWD21 The Honeywell Home water leak detector includes an 85-decibel alarm loud enough to be heard throughout most homes, plus a 6-foot detection cable that can be laid along the floor to detect leaks across a larger area — useful behind refrigerators and along water heater bases.
What to Do When You Find a Leak
Minor leaks (faucet drips, running toilets, visible supply line leaks): DIY repair is appropriate for most homeowners with basic tool skills. Replacement parts are inexpensive and widely available.
Moderate leaks (irrigation breaks, water softener issues, supply line failures at fixtures): DIY repair is feasible with proper shutoff and some plumbing knowledge. If you’re uncertain, call a plumber — the cost of a service call is far less than the cost of a water damage claim.
Major leaks (slab leaks, supply line failures in the wall, whole-system pressure problems): Call a licensed plumber immediately. Turn off the main water supply to stop the flow while you wait. Document everything with photos and video before any repair begins — your homeowner’s insurance may cover the damage and repair depending on the cause and your policy.
How to Request a High Bill Adjustment
If a hidden leak caused your water bill to spike and you’ve since repaired it, most water utilities offer a high bill adjustment or leak adjustment credit as a one-time goodwill credit. Policies vary by utility, but the general process:
- Repair the leak first (before requesting the adjustment)
- Contact your utility’s customer service department and ask about their leak adjustment program
- Provide documentation: plumber’s invoice, photos of the repaired leak, or in some cases a written statement about the repair
- Most utilities will credit a portion of the excess usage — typically 50 percent of the overage above your baseline — for one incident per several-year period
Not every utility offers this program, but it’s always worth asking. On a $400 water bill caused by a slab leak that normally runs $80, a 50 percent leak adjustment could put $160 back in your pocket.
A high water bill is a solvable problem. Work through the tests in this guide systematically, address whatever you find promptly, and consider a smart leak detection device to prevent the next incident from going unnoticed for another billing cycle.

Flow Control HQ Editorial Team
Independent trade-focused editorial team